Key Cultivation Techniques for Gladiolus:
1. Soil Preparation and Fertilization: Gladiolus thrives in well-drained, loose sandy loam soil with a deep root zone. Beds should be raised to about 20 cm in height, with spacing of 1 to 1.5 meters between rows. A balanced NPK fertilizer is essential, applied shallowly due to the plant's shallow root system. Top dressing is recommended at the two-true-leaf stage and during the heading phase, using diluted manure water mixed with urea. Potash is applied once in the mid-growth stage, while nitrogen is reduced later to avoid excessive growth and lodging. For bulb production, additional potash is advised.
2. Bulb Selection and Treatment: After identifying the cultivars, select bulbs that are free from pests and buds, ensuring no mix of species. Before planting, grade the bulbs and soak them in water for 15 minutes, then immerse in 0.1% mercury or 80 times diluted formalin for 30 minutes. Rinse thoroughly before planting to prevent disease spread.
3. Planting Time: In natural conditions, gladiolus is typically planted between April and May when the soil temperature reaches around 10°C. For annual production, adjust planting dates based on desired flowering periods. If you want blooms before New Year’s Day, plant in early September. For the Spring Festival, late September is ideal. Early spring cut flowers can be planted from late November to December. For late May to early June blooming, start seedlings in February and transplant in April. To have flowers for National Day, plant from early June to mid-July.
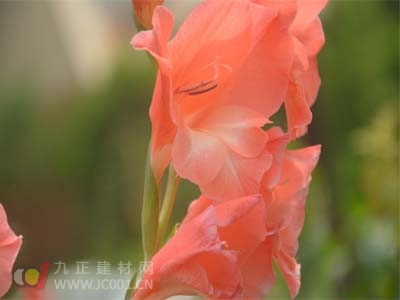
4. Breaking Dormancy: To break dormancy, store bulbs in low temperatures (around 2–3°C) for about three months. If earlier planting is needed, treat bulbs with high heat (35°C) for 15–20 days, followed by cold treatment (2–3°C) for 20 days. Keep bulbs dry during this process to avoid rotting caused by excess moisture.
5. Planting Spacing and Depth: Spacing depends on the variety—large plants need 20 cm square spacing, while small and medium varieties require 10–15 cm. Plant bulbs 3–10 cm deep. To prevent lodging, install two layers of 20 cm nylon mesh on the bed before planting. As the plants grow, stretch the mesh with support poles to keep stems upright and reduce bending.
6. Flower Harvesting and Bulb Storage: Harvest the first open flower, leaving at least three green leaves at the base to allow bulb development. Cut flowers in the afternoon, and pack 10 bundles per box. Dig bulbs when the leaf tips are about one-third developed. After digging, remove the leaves and let the bulbs dry for several hours. Once the outer skin is dry, move them to a storage room. Sort new and secondary bulbs into shallow boxes and store at 5–11°C in a dry, well-ventilated area. Regularly check for heat or mold during storage.
The Steel Pipe sheet includes side plates arranged in a front-to-back manner. The end plates are connected to the two ends of each side plate. The front end of each end plate and the back of the back plate are parallel and closely pasted on the side plate. The steel tube slice pre-assembled mold can be used to pre-assemble steel tube slices of different widths and different bending curvatures to reduce mold specifications and save mold costs.
Sheet Metal Pipe,Steel Tube Pipe,Sheet Metal Square Pipe,Square Tube Pipe
Anshan Lijian Engineering Group Co. LTD , https://www.lijianformwork.com